Welcome to my blog! Here you'll find many samples of my finished art, conceptual work, unpublished material, and other miscellaneous jobs. You can find a complete list of my published books at this link.

I currently have signed copies of THE GREAT MONTEFIACO, WHACKO THE CHOOK, THE PUMPKIN EATER FROM PONDICHERRY, and THE SHIKKER COLA COWS available for purchase. For more info, please contact me at whackothechook@internode.on.net


Thursday, May 11, 2017

SMECK: Part IV

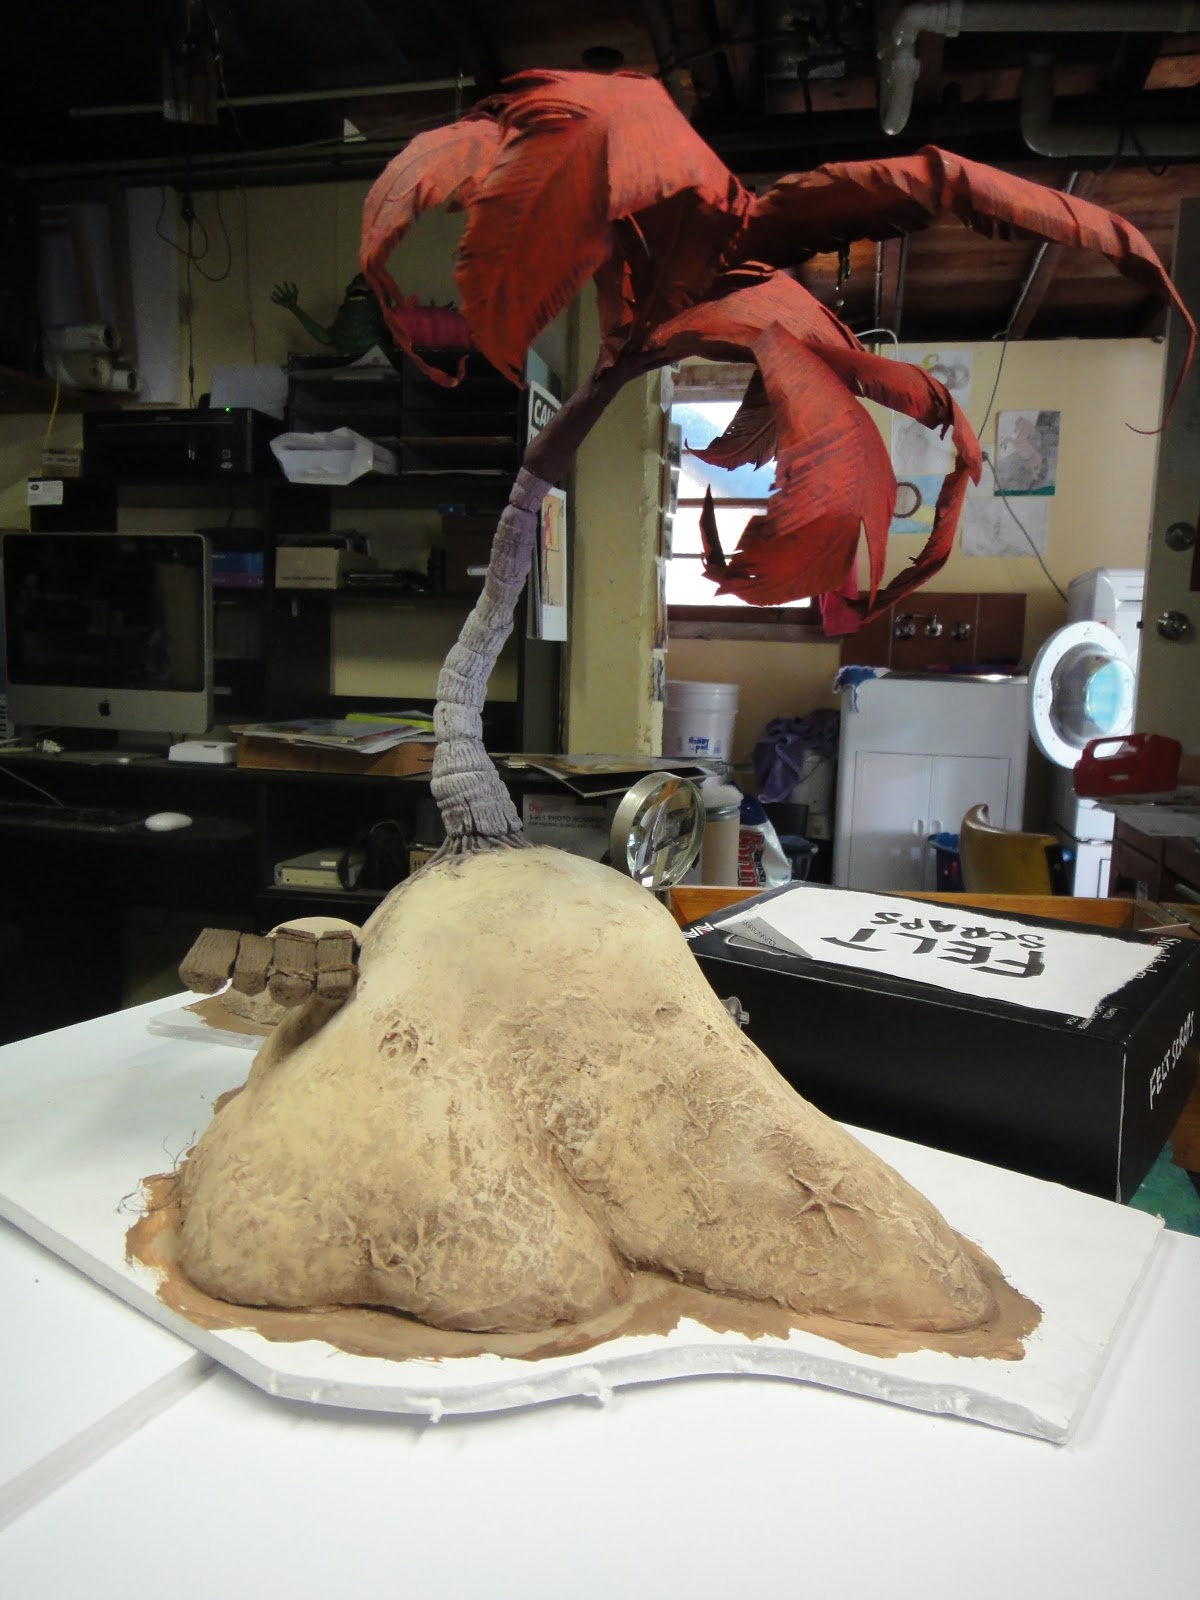
Finally, about midway through 2015, with all the characters and main props finished, it was time to start photography. I bought myself a Nikon 3200 camera, set up the first scene (Smeck on his island), and began experimenting with lighting, at the same time teaching myself how to use the camera manually. It took me precisely 223 shots before I got a result I was happy with (I took well over 2,000 photos overall — Thank god for digital cameras!)


I didn’t have any special lighting at my disposal, just three desk lamps, an animation light-box and miscellaneous lights. I lighted the scenes with a fill light, which was essentially just a pedestal light behind a sheet. I had a metre long LED light to highlight the painted sky. And I used a key light, usually representing sunlight, which created nice highlights and shadows. White reflective cardboard was usually out of shot to take away some of the harshness of the shadows created by the key-light. To add a bit of warmth or coolness to a scene I used coloured cellophane over the lights (very sophisticated). I sometimes used multiple layers and colour combinations until I got the colour just right. It was an extremely finicky process.


When I started photography, I wanted to do as much work ‘in-camera’ as I possibly could. I new there would be extensive work to do in photoshop later on anyway, and as I don’t particularly enjoy working in photoshop I wanted to minimise that workload down the track. This thinking applied to the coloration of the scene, but also with the effects. Some would argue it would be easier to just do it all in photoshop, but I enjoy problem-solving and coming up with imaginative solutions using more primitive methods.

There are many instances where I used optical illusion to bring characters together. As I mentioned, the Sea Thingy was not to scale with Minnie or Smeck, so where possible, when they appear in the same shot together I would place the Sea Thingy in the foreground, and the characters in the extreme background. Looking at a Television screen which I had linked up to the camera, I would carefully line up the characters, often using a whiteboard marker to make reference lines. To keep everything in focus I set the aperture to f/32 and the exposure to 30 seconds. This made the depth of field very shallow so Minnie appears to be sitting on the Sea Thingy’s shell.


To create fog in this same scene I made what I called my “fog stick”, which was a small length of dowling with hobby fill wrapped roughly around it. Taking advantage of the 30 second exposure I would poke the fog stick in and out of the shot in the background. It helped create convincing fog. I did the same trick with this night time scene...


There are many other pages where I used these same cheap tricks. To create an aurora borealis effect I used just a green-tinted light, and my arms, moving in such a way that it looked like I was doing a 30 second piece of performance art.


The most effective example of forced perspective, and the one I am happiest with, was the scene with the Sea Thingy having an encounter with another Deep-Sea Thingy. These two creatures were nowhere near to scale with each other, the latter being far smaller. It was constructed using wire armature, aluminium foil, and Sculpey. I paid particular attention to fine details so that it would still look good blown up next to the Sea Thingy. Again, I carefully positioned it close to the camera, and the Sea Thingy at least a metre or so behind, with crumpled blue/green painted paper filling in the gaps and covering up flaws.


The aperture was set to f/36, with 30 second exposures. During the long exposure I used a moving torch to highlight the Sea Thingy’s face in the background, then the Deep-Sea Thingy’s face in the foreground — this represented light projected from the Deep-Sea Thingy’s bioluminescent light. An intense foggy glow was added later in photoshop, along with foreground fog. I was very pleased with how seamlessly it all came together. It’s a shame to not see this picture in all it’s glory in the finished book, so here is it —


Another scene which has a nice atmosphere is the one with Smeck meeting the pirates for the first time. I wanted a very visible shaft of light pouring down on Smeck. Instead of doing it the easy (and far healthier) way with Photoshop, again taking advantage of the long exposure, I puffed away on a cigar madly blowing smoke from off camera into the scene. This was a last resort after having experimented unsuccessfully with a homemade smoke machine (boiling water and glycerin), and burning mosquito coils. Having removed the batteries from the smoke alarm in my studio, I took a number of photos blowing smoke until I got the haze just right, but I felt dizzy for the rest of the day. It was just one of many “what the hell am I doing?” moments.


The photographs I left until last and were giving me headaches whenever I thought about them, were the sepia panels in the middle of the story. The one saving grace was not having to worry about colour. It was a joy working in black and white, where I could focus solely on light and shadow, and I could cheat endlessly with strategically placing random out-of-focus objects in the foreground and background.


But there was no escaping having to make a heap of props. Things like an axe-grinder, a cannon, cannon balls, a bucket, a barrel, a cauldron, stools, the captains table with maps, telescope, ink well, goblets, sword and candles (with photoshopped flames), a laundry bucket, underwear, and an assortment of fruits and vegetables...


In a few of the panels there are what appear to be suds. This was achieved using small pearl beads which were held together with hair styling clay (I read this is how Aardman animate suds in Wallace and Gromit and Shaun The Sheep).


Everything else was bric-a-brac lying about my studio.


Like I said, black and white is an absolute joy! Given the choice I would love to do a whole book like this one day.

TO BE CONTINUED...


Tuesday, April 11, 2017

SMECK: Part III

Once all the characters were completed, I got to work on Smeck’s island home, along with an assortment of small props to go with it.


The island was made from styrofoam, wire mesh, air-drying clay, and paper magiclay. The palm fronds are wire and layered paper.

I tried a few different methods to create the illusion of rippling water — plastic bags, satin fabric, etc. I even tried cutting and pasting the water in photoshop, which looked okay but felt like too much work later on. It was this experiment however which help form a template for the look and colour of the rest of the book —


In the end I settled on large sheets of painted paper and varnish for the water, and a painted sky backdrop I used for nearly every photo.


The two things which filled me with excitement and dread simultaneously, was the Sea Thingy and the Pirate ship. I had always expected I’d find a cheap and easy alternative to making these; I tried realising them as painted cut-outs, but I just couldn’t get excited about that. I needed them to be as dramatic as possible, as they do mark crucial highlights in the story.

I had to at least make the Sea Thingy as a sculpture. But making him to scale with the other characters (which ranged from about 2” high to 7” or more) was out of the question. I didn’t have the space, funds, or ability to make it 2 or more metres big, so I reduced his size to about half. I set to work making a solid armature from hard wire, bulked it up with putty and styrofoam, then set about sculpting with air-drying clay for the solid bits, but for the parts that needed to be posable (the eye region) I used silk and Paperclay. The shell was made from clay and plaster of paris. The tentacles, of which I made only two (and multiplied later with the help of photoshop), were made from thick aluminium wire, and hobby fill kept in place with string. The skin was made from silk with a thin layer of Paperclay, which was flexible enough to allow the tentacles to be posed in any position. He took 2 months to complete.


I wish I had documented the stages photographically as I was making this character, but as time was in short supply I didn’t have time to document much at all. For the whole book there is very little in the way of photographs showing my process.

The ‘Rag n Bone’. That is the name I gave the Pirate Ship. It is cockney rhyming slang for a toilet (‘the throne’). A toilet was my starting point for the design of the ship. Why a toilet? There is often an association made between spiders and outdoor toilets, so it seemed appropriate that it’s captain, a big hairy spider, should live in and commandeer an old dirty toilet.

I left the ship until last. It filled me with panic every time I thought about it. I knew making it would take a long time out of my schedule. I pondered long and hard about quick and easy ways to accomplish it, but none of it would do. I remember vividly the moment I went upstairs and broke the news to my wife — “honey, I’m making the ship”. “I don’t want to know” was her response, throwing her arms in the air as she walked away.

For the next two or more months the ship came together very slowly...


I used whatever materials and bits of junk I could find around my studio, and other odds and ends found on roads and footpaths. I started with a mixing bowl for the hull, and added onto it wire meshing, clay, putty, timber, lots of balsa wood, bamboo and dowling for the masts, painted silk for the sails and flags, cardboard, and bits of rusted wire. Super Sculpy was used for the Magritte inspired Mermaid figurehead —


The only thing I can remember buying specifically for the ship was the model ship rigging which I bought from a local hobby shop. I studied a lot of photos and paintings of old ships, I even watched Youtube clips on the subject, just to get an idea of the function of each rope. I also went on board the ship "Notorious" when it docked in Brisbane and took a lot of mental notes. I ended up faking much of it though.


I hadn’t made a model with this level of detail before, so I was flying blind. I made it all up as I went along, inventing different techniques for overcoming problems. For example, for the balustrades that lined the edge of the ship, I secured a drill horizontally onto the bench top with clamps, and using a narrow dowel fastened into the drill one end and slotted into place in a timber block the other end, I had created a miniature makeshift lathe. It worked surprisingly well. A small chisel and creased sandpaper was used to create the grooves. It wasn’t perfect, but it achieved the rough-edged look I was after.

The ship was by far the most challenging and time-consuming of all the props made, but I was very happy I persevered with it. It looks infinitely better than the ship I designed on paper, and painting it two-dimensionally would have been a nightmare. The same could be said about all the characters and props. However, I didn’t make it to scale with the characters, or the Sea Thingy. It was too small for the characters, and too big for the Sea Thingy. It was becoming apparent that Photoshop would play a massive part in the post-photography stage down the track.

TO BE CONTINUED...

Monday, April 3, 2017

SMECK: Part II

Around the time I started the roughs for Smeck, I made a fixed model of it's central character from wire and polymer clay. I made this for basic reference, but it didn't come in handy too often.


Much later, whilst at my wits end from the countless false starts I had already made with the final stages, I found myself sitting at my work table with a roll of aluminium armature wire, some Multi-purpose Putty, newly discovered Paper Magiclay, amongst other bits and pieces of found items. By this stage I felt like I had nothing to lose, so I constructed one of the pirates from the book — the Mosquito.


I painted him with dark tones, then dry brushed on the lighter tones. I really enjoyed the process, and I thought it looked pretty good. So I started on the spectacled Beetle (the ship’s doctor) in the same way, but refining my approach and adding different materials. He also looked pretty good, and in my opinion better than how I had drawn him.


I brought materials to the lunch table at work and pushed to one side the self-consciousness I feel when being watched creating art. Here I was mainly doing the wire armatures, then adding the padding and ‘flesh’ at home. But I started doing everything — armatures, sculpting and painting whenever and wherever I could. I was enjoying the process so much that finally a creative spurt took hold. I no longer needed to warm-up, I could hit the ground running each time I got the materials and equipment out.

I still didn't know why I was doing it this way, at the most I thought they’d make good reference models if I decided to give painting another shot. I was also expecting to get tired of this process before making any significant progress anyway, but before I knew it I was working on more characters.


And so, this creative burst served me for the next 2-3 years. It became a reason to get up every morning. I would hurry to work just so I could squeeze in 30 minutes before 7am. I would be giddy with excitement waiting for lunch time, just so I could keep working on my models. I felt a purpose every day, and I was no longer feeling despair at having thrown away my illustration career for the most mundane of paid jobs.
Still, I didn’t know what on earth I was going to do with these models once they were made. It was assumed I’d photograph them in some way, but that would require large sets, expensive lighting, a fancy camera — things I didn’t possess and areas of expertise I just didn’t have. But the key to getting anything done and to maintain my motivation was to avoid looking at the big picture in any way. My destination was thwart with insurmountable obstacles, that was clear, but if I let this thought be entertained in my mind for too long I would have quickly talked myself out of it. Instead I focussed on the little things, one small model at a time. A part of me was still resigned to the fact that my steam would run out eventually anyway, sooner rather than later. If I called it quits altogether I wouldn't have minded because I was having so much fun making the models anyway. I had learned so much that this experience would have been compensation enough. I was secretly praying the publisher would save me the bother of quitting and just tell me they no longer wanted to publish it, just so I didn’t have to see it through. But my enthusiasm didn’t waiver (not until the absolute final stages anyway), and I kept on chipping away at it ever so slowly.

By the time one year had passed, and I had reached my original deadline, in that time I had created models for the entire pirate crew. There was also Minnie the Mermaid, who was extremely fiddly to make, and the cause of much loud cussing during photography much later on...


And of course there was Smeck, complete with 9 interchangeable heads —


One of the most crucial props made was Smeck's ukulele —


At less than 2cm in length it was very intricate. It was made mainly from cardboard, with strings fashioned from my dog's hair.

But I still had a heap of other things to make.

I told the publisher what I was doing and explained my unideal circumstances, and at the rate I was going I would need yet another year to complete the book. Again, I was secretly praying they would say no to my request and I would have no choice but to abandon this madness. But they didn't. The were more than accommodating. Sigh...


TO BE CONTINUED...