


Once all the characters were completed, I got to work on Smeck’s island home, along with an assortment of small props to go with it.
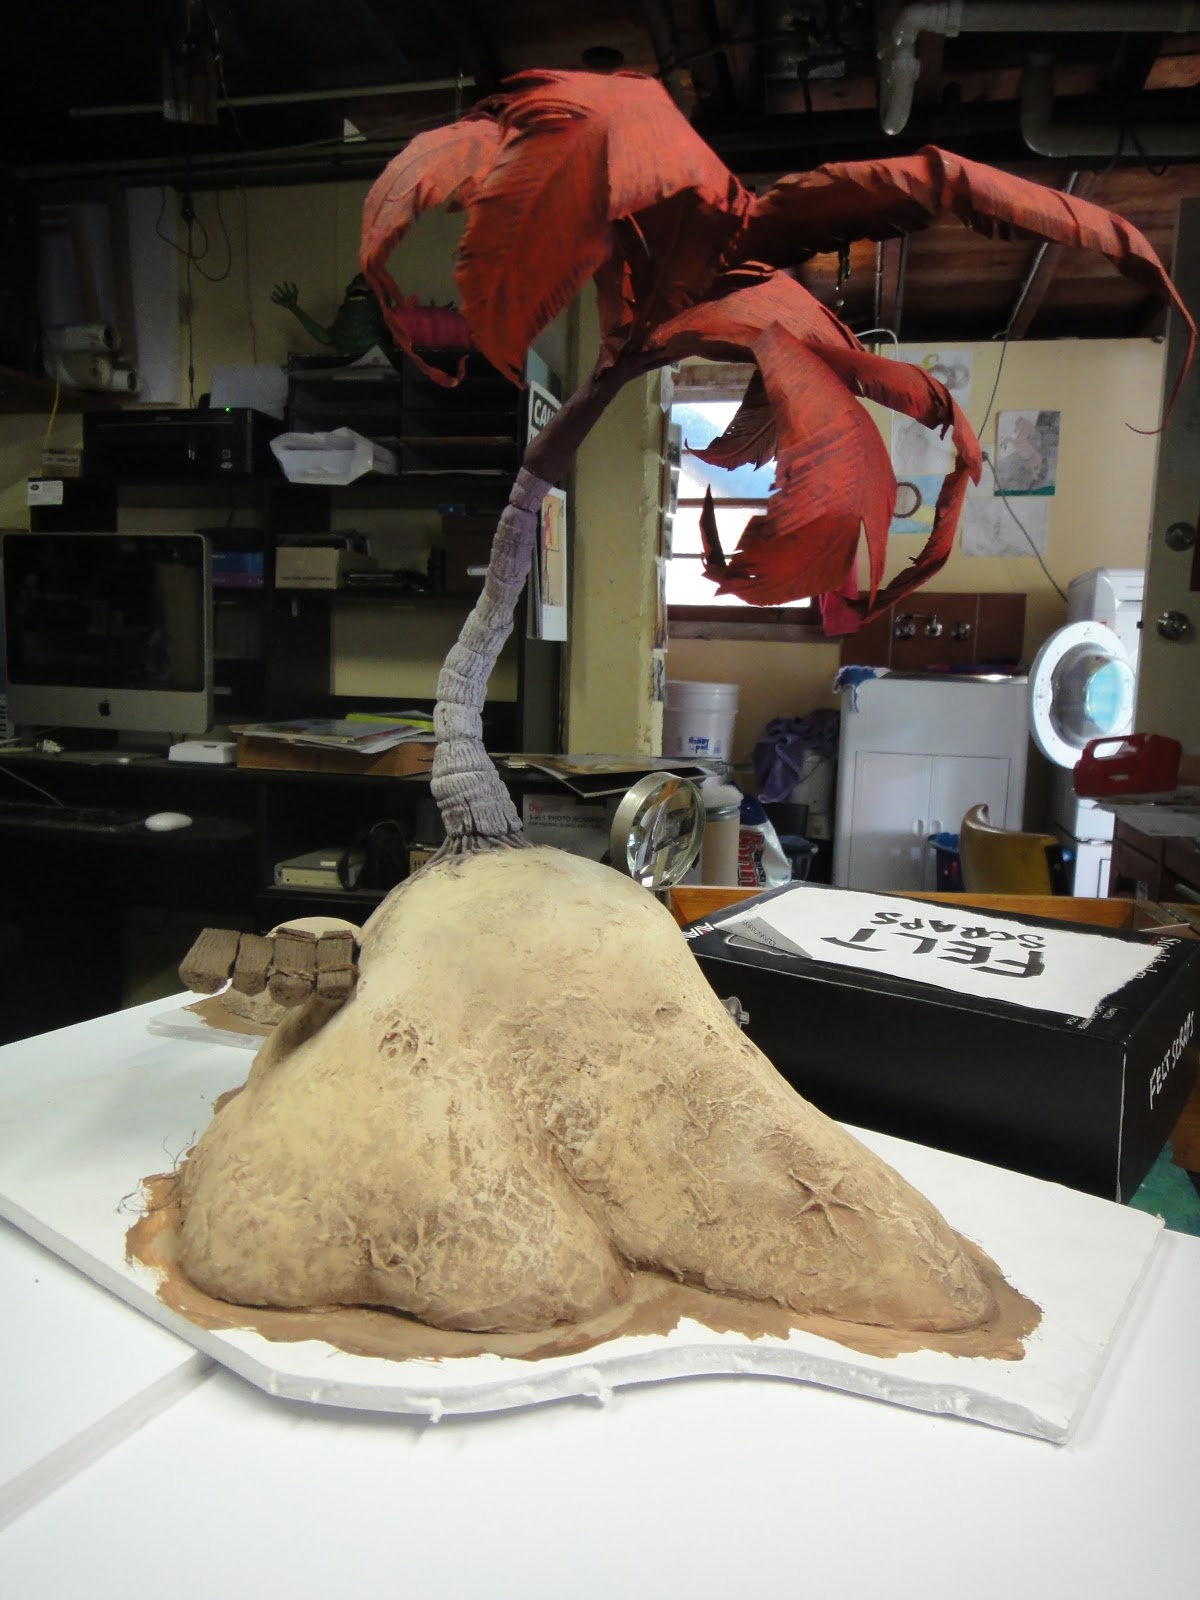


The island was made from styrofoam, wire mesh, air-drying clay, and paper magiclay. The palm fronds are wire and layered paper.
I tried a few different methods to create the illusion of rippling water — plastic bags, satin fabric, etc. I even tried cutting and pasting the water in photoshop, which looked okay but felt like too much work later on. It was this experiment however which help form a template for the look and colour of the rest of the book —

In the end I settled on large sheets of painted paper and varnish for the water, and a painted sky backdrop I used for nearly every photo.

The two things which filled me with excitement and dread simultaneously, was the Sea Thingy and the Pirate ship. I had always expected I’d find a cheap and easy alternative to making these; I tried realising them as painted cut-outs, but I just couldn’t get excited about that. I needed them to be as dramatic as possible, as they do mark crucial highlights in the story.
I had to at least make the Sea Thingy as a sculpture. But making him to scale with the other characters (which ranged from about 2” high to 7” or more) was out of the question. I didn’t have the space, funds, or ability to make it 2 or more metres big, so I reduced his size to about half. I set to work making a solid armature from hard wire, bulked it up with putty and styrofoam, then set about sculpting with air-drying clay for the solid bits, but for the parts that needed to be posable (the eye region) I used silk and Paperclay. The shell was made from clay and plaster of paris. The tentacles, of which I made only two (and multiplied later with the help of photoshop), were made from thick aluminium wire, and hobby fill kept in place with string. The skin was made from silk with a thin layer of Paperclay, which was flexible enough to allow the tentacles to be posed in any position. He took 2 months to complete.


I wish I had documented the stages photographically as I was making this character, but as time was in short supply I didn’t have time to document much at all. For the whole book there is very little in the way of photographs showing my process.
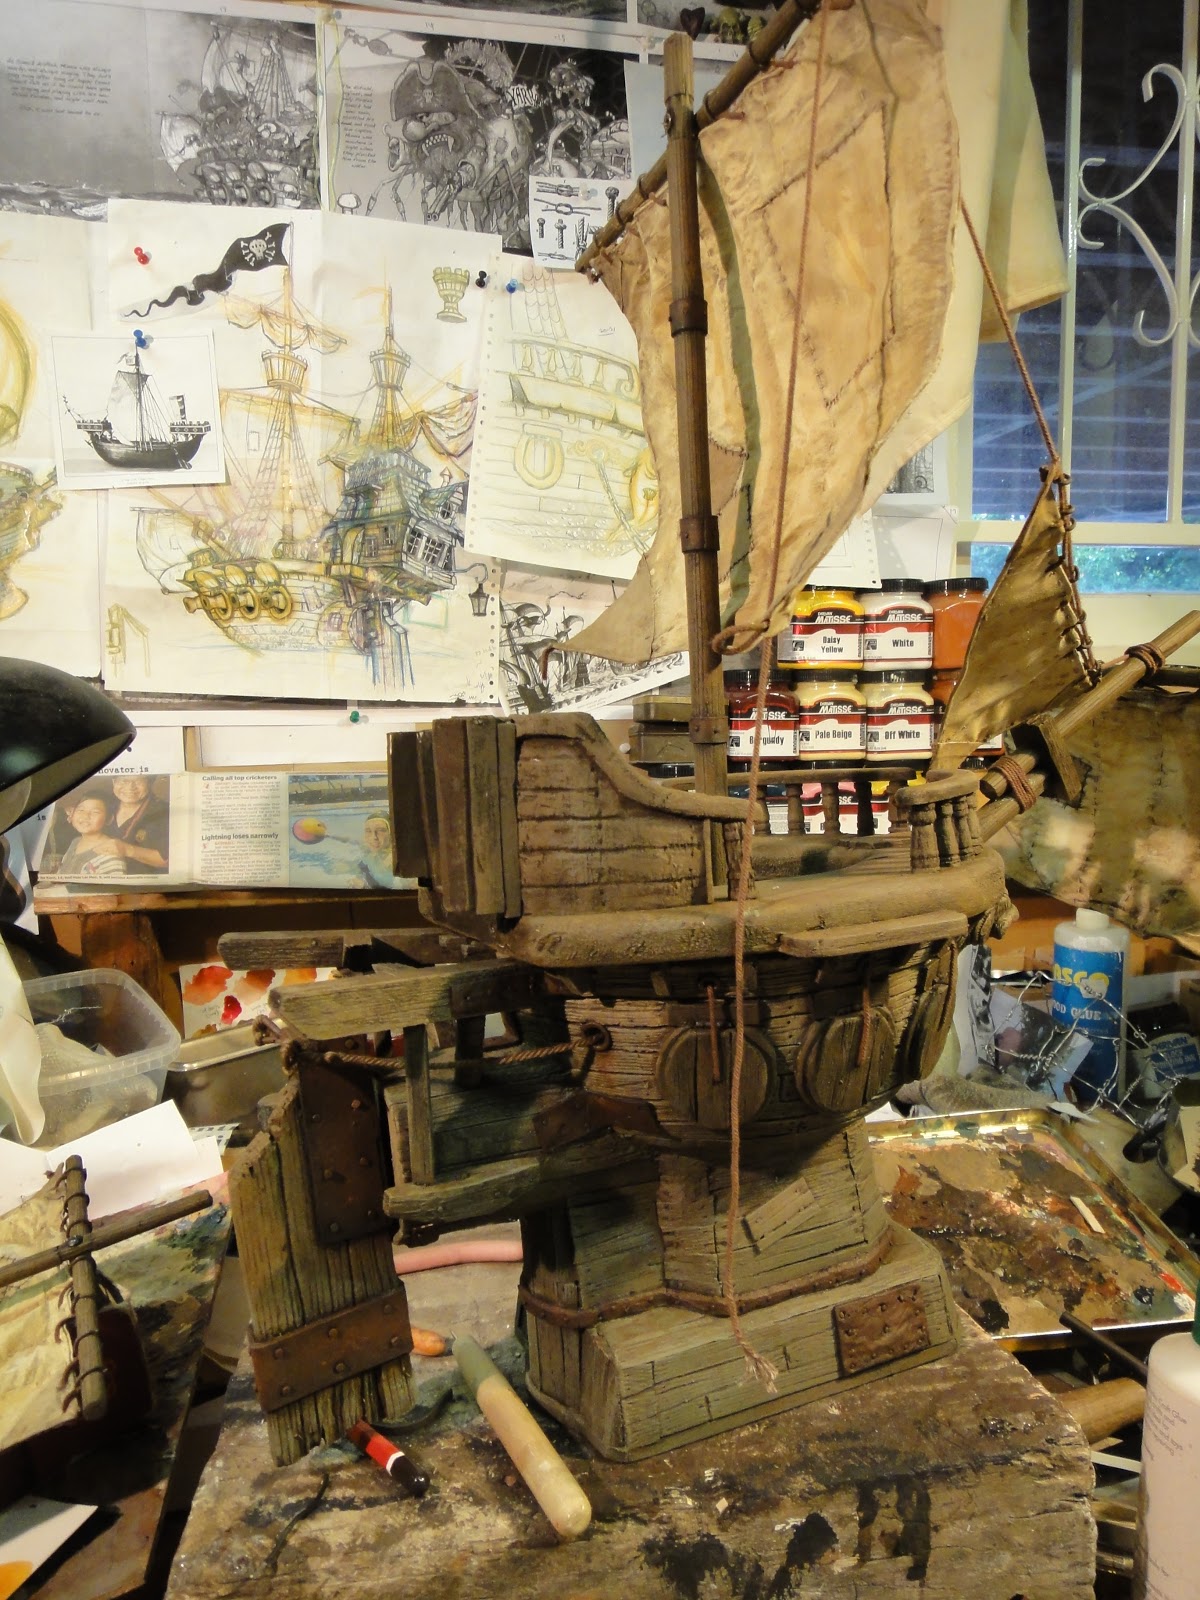
The ‘Rag n Bone’. That is the name I gave the Pirate Ship. It is cockney rhyming slang for a toilet (‘the throne’). A toilet was my starting point for the design of the ship. Why a toilet? There is often an association made between spiders and outdoor toilets, so it seemed appropriate that it’s captain, a big hairy spider, should live in and commandeer an old dirty toilet.


I left the ship until last. It filled me with panic every time I thought about it. I knew making it would take a long time out of my schedule. I pondered long and hard about quick and easy ways to accomplish it, but none of it would do. I remember vividly the moment I went upstairs and broke the news to my wife — “honey, I’m making the ship”. “I don’t want to know” was her response, throwing her arms in the air as she walked away.
For the next two or more months the ship came together very slowly...


I used whatever materials and bits of junk I could find around my studio, and other odds and ends found on roads and footpaths. I started with a mixing bowl for the hull, and added onto it wire meshing, clay, putty, timber, lots of balsa wood, bamboo and dowling for the masts, painted silk for the sails and flags, cardboard, and bits of rusted wire. Super Sculpy was used for the Magritte inspired Mermaid figurehead —


I used whatever materials and bits of junk I could find around my studio, and other odds and ends found on roads and footpaths. I started with a mixing bowl for the hull, and added onto it wire meshing, clay, putty, timber, lots of balsa wood, bamboo and dowling for the masts, painted silk for the sails and flags, cardboard, and bits of rusted wire. Super Sculpy was used for the Magritte inspired Mermaid figurehead —


The only thing I can remember buying specifically for the ship was the model ship rigging which I bought from a local hobby shop. I studied a lot of photos and paintings of old ships, I even watched Youtube clips on the subject, just to get an idea of the function of each rope. I also went on board the ship "Notorious" when it docked in Brisbane and took a lot of mental notes. I ended up faking much of it though.

I hadn’t made a model with this level of detail before, so I was flying blind. I made it all up as I went along, inventing different techniques for overcoming problems. For example, for the balustrades that lined the edge of the ship, I secured a drill horizontally onto the bench top with clamps, and using a narrow dowel fastened into the drill one end and slotted into place in a timber block the other end, I had created a miniature makeshift lathe. It worked surprisingly well. A small chisel and creased sandpaper was used to create the grooves. It wasn’t perfect, but it achieved the rough-edged look I was after.

I hadn’t made a model with this level of detail before, so I was flying blind. I made it all up as I went along, inventing different techniques for overcoming problems. For example, for the balustrades that lined the edge of the ship, I secured a drill horizontally onto the bench top with clamps, and using a narrow dowel fastened into the drill one end and slotted into place in a timber block the other end, I had created a miniature makeshift lathe. It worked surprisingly well. A small chisel and creased sandpaper was used to create the grooves. It wasn’t perfect, but it achieved the rough-edged look I was after.
TO BE CONTINUED...
This comment has been removed by the author.
ReplyDeleteBeautiful article
ReplyDeleteThis post is a gem thank you for sharing your wisdom.
ReplyDeleteClick Here: Photo Color Correction Service